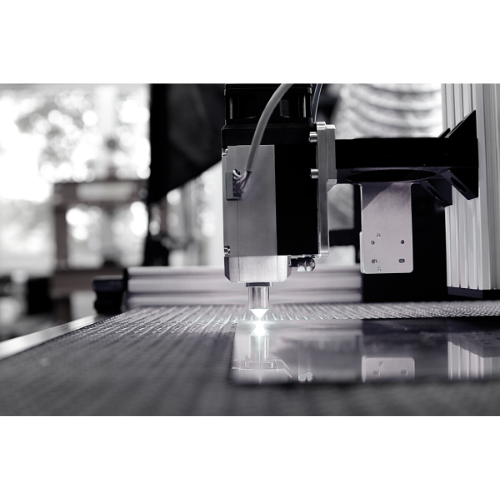
In this post, we delve into the process of preparing a design file for 3D printing, exploring every step from conceptualization to post-processing. Below is a short recap of the essential steps:
Contents
Importance of proper file preparation for 3D printing
Preparing the design file properly is a crucial step in the 3D printing process. The file acts as the blueprint for the 3D printer, instructing it on how to build the object layer by layer. Errors in the file can lead to print failures, poor quality prints, or wasted material. Proper file preparation ensures that the printed object accurately represents the original design, has the desired structural integrity, and requires minimal post-processing work. This chapter will cover in detail the steps to create, check, and prepare a design file for successful 3D printing.
3D design concepts
Before embarking on your 3D printing journey, it is important to grasp the foundational concepts that underpin 3D design. Understanding these concepts will provide the necessary groundwork for creating and preparing your own design files.
Basic concepts in 3D design
1. Geometry: in 3D design, geometry refers to the mathematical description of an object’s shape. This can be broken down into two primary types: primitive and complex geometry. Primitives are basic shapes like cubes, spheres, and cylinders, while complex geometry involves intricate designs made by combining multiple shapes or through advanced modeling techniques.
2. Mesh: the mesh is the visual representation of your model, typically made up of polygons (often triangles). The complexity of a mesh can have a significant impact on both the detail of the final printed object and the processing power required to create it.
3. Vertices, Edges, and Faces: these are the components that make up a mesh. Vertices are the points where edges meet, edges are the lines that connect vertices, and faces are the flat surfaces enclosed by the edges.
4. Manifold vs. Non-manifold Geometry: a manifold object is one where all edges are connected to exactly two faces, often referred to as ‘watertight’. Non-manifold objects have edges that are not connected in this way and can cause problems when 3D printing.
3D modeling software options
There are numerous 3D modeling software options available, each with its own strengths and weaknesses. The best choice depends on your specific needs, skill level, and budget.
1. CAD Software: CAD (Computer-Aided Design) software like AutoCAD, SolidWorks, and Fusion 360 are powerful tools that are particularly suited to precision parts and engineering projects.
2. Sculpting Software: tools like ZBrush and Blender’s sculpting mode are used for more organic shapes, making them popular in character modeling and animation.
3. Beginner-Friendly Software: Tinkercad and SketchUp are simpler and more intuitive, making them a great choice for beginners or hobbyists.
Understanding File Formats for 3D Printing
1. STL: the STL (STereoLithography) file format is the most commonly used in 3D printing. It represents the surface geometry of a 3D object without any representation of color, texture, or other common CAD model attributes.
2. OBJ: the OBJ file format is another commonly used format that, unlike STL, supports color and texture information. This can be useful for multi-color 3D printing.
3. 3MF: the 3MF (3D Manufacturing Format) is a newer format that aims to streamline the 3D printing process. It retains more information than STL or OBJ files and is considered by some to be the future of 3D print files.
Understanding these foundational concepts will be crucial as you create and prepare your own design files for 3D printing.
Creating a 3D model
Conceptualizing your design
The first stage of 3D modeling is conceptualization. Here, you take your initial idea and form a comprehensive understanding of how it will translate into a physical object. It’s crucial to consider the object’s purpose, required dimensions, functionality, aesthetic, and how it will interact with its environment or other components.
Creating sketches of your design from various angles can help visualize the final product, including details such as texture, color, or any specific features you want to highlight. During this phase, taking into account the limitations and possibilities of 3D printing is crucial, including the material you plan to use, the size of the print bed, and the amount of detail the printer can handle.
Building the design in 3D modeling software
Next, you will begin building your design using a 3D modeling software. Numerous software options exist, from professional-grade software like AutoCAD, SolidWorks, and Rhinoceros, to beginner-friendly options like Tinkercad and Sketchup. For more organic models, sculpting software such as ZBrush or Blender might be more suitable.
3D modeling involves creating a mesh, a series of vertices, edges, and faces that define the shape of your object. There are two primary types of modeling – solid modeling, where the object is built as a solid whole, and surface modeling, where the object’s surface is defined without necessarily creating a solid body.
Starting with basic shapes like cubes, spheres, or cylinders, you’ll use tools in the software to modify these shapes, combining, stretching, or cutting them to form your design. Remember to keep in mind the limitations of your 3D printer, avoiding overhangs that are too steep or details too small for your printer to handle.
Important considerations for 3D printing
A vital aspect to consider when creating your 3D model is wall thickness. In 3D printing, this refers to the distance between one surface of your model and its opposite sheer surface. A model with walls that are too thin may not print correctly or could be fragile and break easily. Conversely, walls that are too thick might use unnecessary material and increase printing time.
Another key concept is the overhang angle. This is the angle at which a part of the model extends horizontally beyond the part of the model directly beneath it. If the angle is too extreme, you might need to include supports in your design, which can affect the finish of your printed object.
Finally, be aware of the resolution of your 3D printer. Resolution is the smallest movement a 3D printer can make and determines the level of detail in the printed object. This is usually measured in microns, with a smaller number indicating a higher resolution. Designs with details smaller than your printer’s resolution might not print as expected.
Overall, creating a 3D model for printing requires a blend of creativity, precision, and technical understanding. It’s a process that can be as simple or complex as you need it to be, and mastering it opens up a world of possibilities in 3D printing.
Preparing the Design File for 3D Printing
A. Checking and Repairing the 3D Model
After you finish modeling your design, it’s essential to thoroughly check and repair it if necessary. Even the most skilled designers can make minor mistakes, and these can cause issues when it comes to 3D printing. Using software tools like Meshmixer or Netfabb, check for common problems such as non-manifold edges, intersecting faces, and holes in the mesh. These tools can also assist with repairing any issues found, ensuring your model is solid and watertight, which is crucial for a successful 3D print.
B. Ensuring the Design Meets 3D Printing Criteria
Next, you need to ensure your design meets the specific criteria for 3D printing. For instance, you should check the wall thickness of your model to ensure it is sufficient for the printing material you’ve chosen. If the walls are too thin, the print might fail, or the final product might be too fragile. Similarly, you should make sure your model’s overhangs are properly supported. Some 3D printers can handle certain degrees of overhang without supports, but many require added support structures for overhangs beyond a 45-degree angle.
C. Converting the Model to a 3D Print-Ready Format
Once you’ve checked and fixed your model, it’s time to convert it into a 3D print-ready format. The most common file formats for 3D printing are STL (Stereolithography) and OBJ (Object) files. STL files are the most widely used and are compatible with almost all 3D printers. However, if your design includes color or texture, you might prefer to use an OBJ file, which can include this data.
D. Slicing the Model
After converting your model to a 3D print-ready format, the next step is slicing. Slicing is the process of converting your 3D model into layers, creating a roadmap for your 3D printer to follow. This is done using slicing software like Cura or Slic3r. You’ll need to set your slicing preferences, which can include layer height, print speed, infill density, and support structures, among others. These settings will vary depending on your specific printer, the material you’re using, and the desired finish of your print.
E. Previewing the Print
Finally, before sending your file to the printer, most slicing software allows you to preview the print. This can help you identify any potential issues that might arise during printing. For instance, you can check if the support structures are adequate, if the infill pattern is appropriate for your design, or if the layering process seems to be proceeding logically. This step can save you a lot of time, material, and frustration by preventing failed prints.
Optimizing the 3D printing process
Choosing the right material for 3D printing
The choice of material for 3D printing can significantly affect the quality of the final print. Factors such as the desired strength, flexibility, color, and texture of the object will influence the material selection. Two common materials are PLA (Polylactic Acid) and ABS (Acrylonitrile Butadiene Styrene), both with distinct properties and ideal applications.
PLA: this is a biodegradable material derived from renewable resources like cornstarch or sugarcane. It’s best for beginners due to its ease of use. However, it’s not very heat-resistant or durable, making it unsuitable for high-stress applications.
ABS: this is a strong, flexible, and heat-resistant material. It’s ideal for producing durable parts or prototypes that will be subject to wear and tear. However, ABS can be more challenging to print with, as it requires a heated bed and ventilated space.
Other materials, like PETG, Nylon, and Resin, each have their own unique properties and may be better suited for specific applications.
Selecting the appropriate 3D printer settings
Choosing the correct 3D printer settings is vital to ensure high-quality prints. Key settings to consider include:
Layer Height: this determines the thickness of each layer of your 3D print. Lower layer heights result in finer detail but take longer to print.
Print Speed: this affects how quickly the 3D printer creates the object. Higher speeds may decrease print time but can impact print quality.
Infill Density: this determines the internal structure of the 3D printed object. A higher infill results in stronger, heavier objects, but uses more material and increases print time.
Support Structures: for designs with overhangs or unsupported sections, you may need to add support structures, which can be removed after printing.
Make sure to check your 3D printer’s manual or consult with experienced users to understand the best settings for your specific printer and material.
Post-Processing Techniques
Post-processing can enhance the appearance and functionality of your 3D printed objects. Common methods include:
Sanding: this helps smooth out rough surfaces and layers on your print.
Priming and Painting: applying a primer can make a print smoother and ready for painting, enhancing its appearance.
Annealing: heating the print in a controlled way can increase its strength and stability.
Acetone Vapor Bath (for ABS prints): this can give the object a smooth, glossy finish.
Remember, safety is crucial during post-processing, particularly when using tools or chemicals. Always work in a well-ventilated area and use personal protective equipment (PPE) as required. By choosing the correct material, selecting appropriate 3D printer settings, and applying suitable post-processing techniques, you can optimize your 3D printing process and achieve high-quality results.
Common issues and troubleshooting
Identifying and fixing common problems
The process of 3D printing involves complex technology and can present several challenges. Some common issues include:
Printing Does Not Start: ensure that the 3D printer is properly connected and receiving data. Check that the correct file format is used and the design file is not corrupted.
Poor Adhesion to the Build Plate: this is often due to incorrect bed leveling or improper first layer settings. Make sure the build plate is level and clean. The nozzle’s distance from the build plate is crucial; it should be close enough to allow the filament to stick but not too close to block the filament extrusion.
Layer Shifting: if your prints are showing signs of shifting in the X or Y direction, it’s often due to loose belts on the respective axis. Tightening the belts and ensuring the printer is on a stable surface can mitigate this problem.
Stringing: stringing occurs when small strands of filament are left behind during the print, creating a web-like effect. This is usually due to incorrect retraction settings or printing temperature being too high. Adjusting these settings can help reduce stringing.
Over-extrusion and Under-extrusion: over-extrusion is when too much filament is extruded, resulting in blobs and zits on the print. Under-extrusion is when not enough filament is extruded, resulting in gaps and thin layers. These issues can be solved by adjusting the extrusion multiplier or flow rate.
Tools for troubleshooting
Several software and hardware tools can help in troubleshooting 3D printing issues:
Slicer Software: software like Cura, PrusaSlicer, and Simplify3D allow you to preview your model layer by layer before printing. This can be beneficial in identifying potential print issues ahead of time.
Calipers: used for measuring the exact dimensions of your model and the printed object to ensure accuracy.
3D Printer Toolkit: basic tools like a spatula for print removal, nozzle cleaning needles, and a set of Allen wrenches can aid in maintaining and troubleshooting your printer.
Seeking help from the 3D printing community
There is a vast community of 3D printing enthusiasts who share their experiences, solutions, and tutorials online. If you’re struggling with a problem, it’s likely someone else has faced it before. Platforms like Reddit, various 3D printing forums, and YouTube can be excellent resources for help and advice.
Technical software options
Here is a list of some of the best software options for each step in the process of preparing a design file for 3D printing:
Create a 3D model: some popular CAD software options for creating 3D models include AutoCAD, SketchUp, Fusion 360, and Blender.
Check and repair a 3D model: some popular software options for checking and repairing 3D models include MeshLab, Netfabb, and Magics.
Export the 3D model in a printable format: the most common file formats for 3D printing are .stl and .obj. Most CAD software programs will have options for exporting models in these formats.
Slice the 3D model: some popular slicing software options include Cura, Slic3r, and Simplify3D.
Transfer the sliced model to the 3D printer: this will typically involve using printer control software provided by the printer manufacturer, such as Ultimaker Cura or MakerBot Print.
Overall, there are many different software options available for each step in the process of preparing a design file for 3D printing. It is important to choose software that is compatible with your specific needs and the type of printer that you are using.
Resources and further reading
Recommended Books and Guides on 3D Printing
- “3D Printing for Dummies” by Richard Horne and Kalani Kirk Hausman: Amazon Link
- “Functional Design for 3D Printing” by Clifford Smyth: Amazon Link
- “The 3D Printing Handbook” by Ben Redwood, Filemon Schöffer, and Brian Garret: 3D Hubs
Online Resources and Tutorials
- Thingiverse: A design community for discovering, making, and sharing 3D printable things. Link
- Tinkercad: A simple, online 3D design and 3D printing tool. Link
- Coursera: Offers a range of comprehensive courses on 3D printing, from beginner to advanced levels. Link
- Udemy: Another platform offering a wide array of 3D printing courses. Link
- GrabCAD: A large online community of professional engineers, designers, manufacturers, and STEM students. Link
Forums and Communities for 3D Printing Enthusiasts
- r/3Dprinting on Reddit: A community where you can post questions, share your projects, and learn from others’ experiences. Link
- 3D Hubs Talk: An active forum with helpful categories like 3D print troubleshooting, software and hardware discussions, and showcases of user projects. Link
- RepRap Forums: A community-based forum focused on open-source 3D printers. Link
The world of 3D printing is vast and constantly evolving. These resources can provide you with a strong foundation, but the most important learning often comes through hands-on experimentation and interaction with the 3D printing community. Stay curious, keep learning, and most importantly, enjoy the creative journey!